How to Fix Cracks in Exterior Wood Trim Before Painting
A practical guide to filling, sealing, and stabilizing cracked exterior wood trim before painting season.
The short answer
To fix cracks in exterior wood trim before painting, first make sure the wood is still sound, then scrape loose paint, fill the crack with an exterior-grade filler where appropriate, caulk flexible joints, sand the repair smooth, and prime before painting. The right repair depends on whether the crack is in the face of the wood, at a moving joint, or caused by early rot.
When this is a DIY job and when it is not
This is a good DIY repair when the trim is mostly solid and the cracks are shallow, localized, or caused by paint failure and weathering.
Stop and consider replacement if you find:
- Wood that crumbles under a screwdriver
- Repeated moisture exposure from roof, gutter, or flashing issues
- Wide splits that run through a large section of trim
- Insect damage or hidden rot behind the board
- Window or door trim that has pulled loose from the wall
Painting over bad wood hides the problem for a minute, not for a season.
Caulk vs filler, which one goes where
This is the part that trips people up.
Use exterior wood filler or epoxy filler for cracks, gouges, and damaged areas in the face of the trim where you need a sandable repair.
Use paintable exterior caulk for joints where trim meets siding, trim meets trim, or other seams that move slightly with weather.
If you put a rigid filler in a flexible joint, it often cracks again. If you try to use caulk like body filler, the paint job usually looks lumpy and weak.
Step 1: Inspect the crack and check whether the wood is still sound
Press the trim lightly with a screwdriver or awl. If the wood is firm and only the surface is cracked, you are likely dealing with a repairable prep issue. If the tool sinks in easily or the wood feels spongy, slow down and check for rot.
Also look upward. Failed gutters, roof drips, and missing flashing often cause the damage that shows up as cracked trim below.
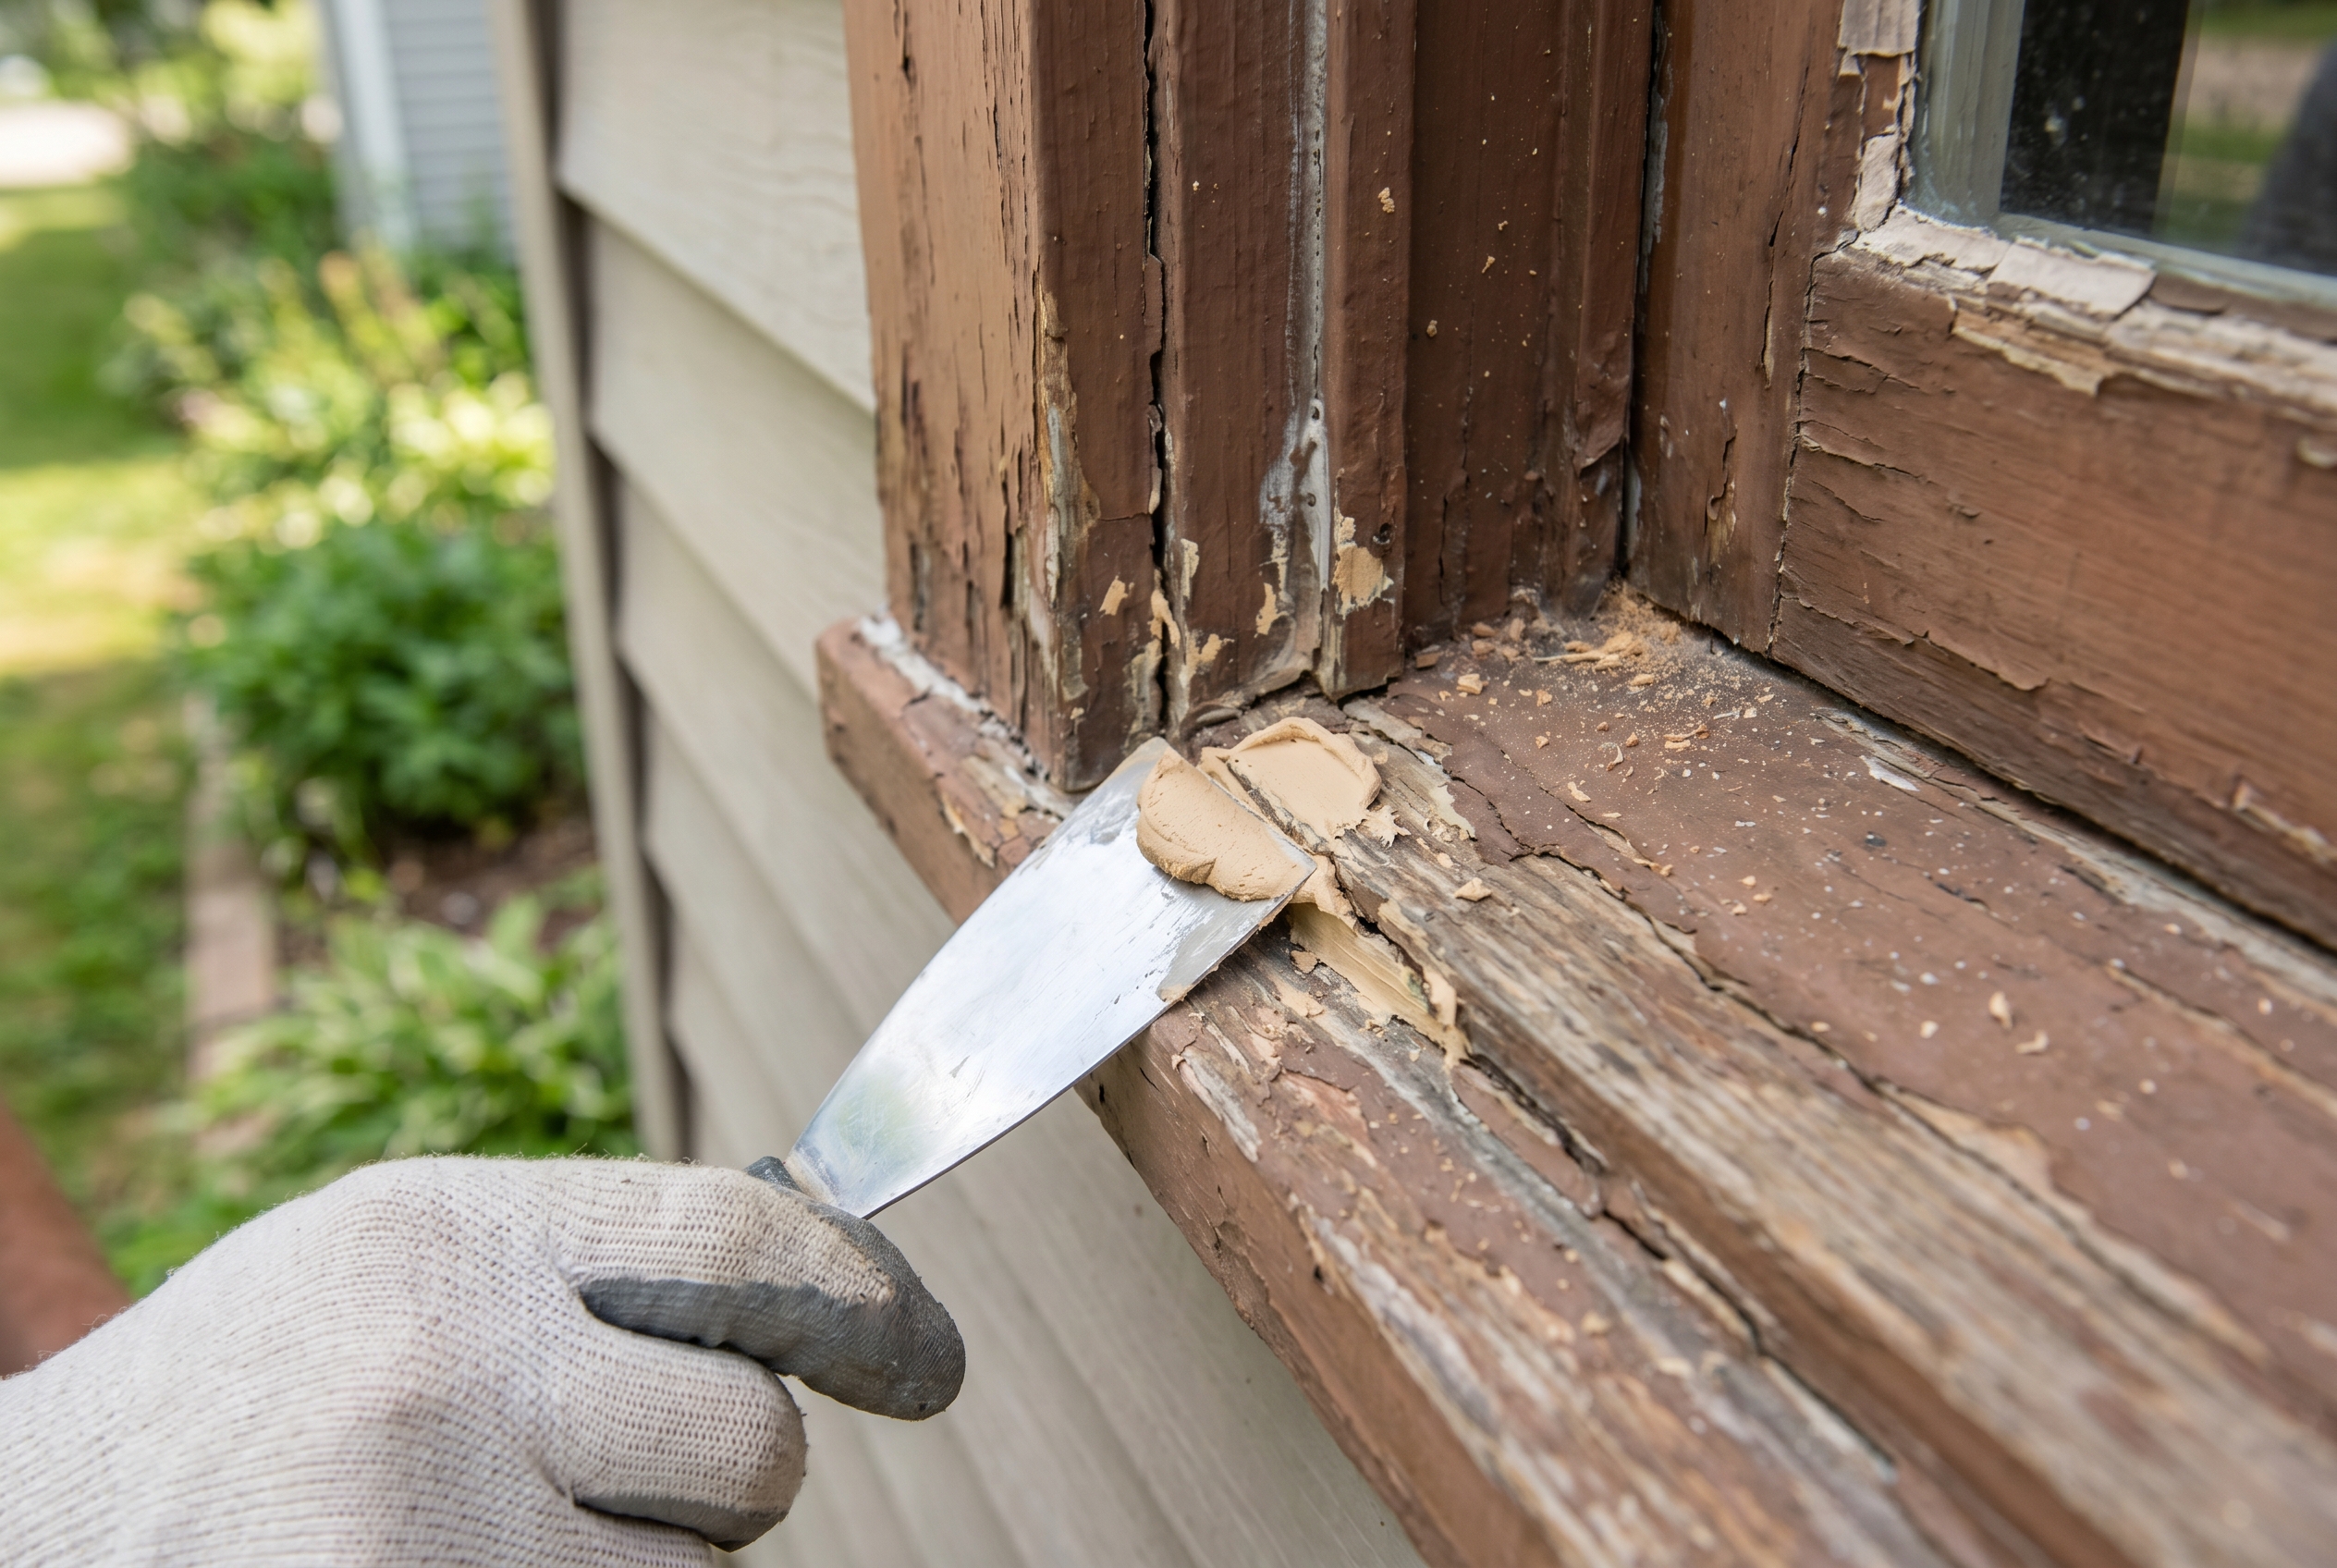
Step 2: Scrape loose paint and clean the repair area
Use a scraper or 5-in-1 tool to remove loose paint and weak material around the crack. Brush off dust and debris. If the crack edges are ragged, lightly open them just enough for the repair product to seat properly.
A repair only lasts if it bonds to solid material. Loose paint under primer is one of the fastest ways to waste a weekend.
Step 3: Fill face cracks with the right exterior repair product
For small to moderate cracks in solid wood, an exterior-grade filler works well. For minor soft spots, a wood hardener followed by epoxy filler can buy you more life if the area is still limited and structurally sound.
Press the filler in firmly and slightly overfill so you can sand it flush later. Follow the product cure time. Exterior products vary a lot, so this is one place where the label matters.
Step 4: Caulk moving joints and sand everything smooth
Once the filled areas have cured, sand them smooth with the surrounding trim. Then caulk the joints that actually need flexibility, such as where casing meets siding or where two trim boards meet.
Do not caulk the underside of every board indiscriminately. Some assemblies need drainage and drying paths. Seal obvious weather-exposed joints, not every gap you can find.
Step 5: Prime first, then paint for weather protection
Spot-prime bare wood and repaired areas with a quality exterior primer. Then apply matching exterior paint. Primer matters here because filler, exposed wood, and old paint all absorb finish coats differently.
Without primer, repaired patches often flash through the paint or fail early.
Common mistakes that make exterior trim cracks come back
Painting over active rot
If water keeps getting in, the crack will come back and spread.
Using interior filler or cheap caulk outdoors
Exterior exposure is harsher than most quick fixes can handle.
Confusing cracks with joints
Rigid filler belongs in damaged wood faces. Flexible sealant belongs in moving seams.
Skipping primer on repaired spots
That can lead to uneven sheen, poor adhesion, and shorter paint life.
DIY vs calling a pro
DIY makes sense for light to moderate cracking on otherwise healthy trim.
Call a pro if:
- the board is rotten through much of its length
- the damage is near rooflines or second-story trim
- you suspect flashing or water-management failure behind the trim
- the home may contain lead paint and you are not equipped to deal with it safely
Internal links you may also want
- How to Reseal Drafty Windows Without Replacing Them
- How to Repair Loose Deck Boards and Popped Fasteners
- Bathroom Re-Caulking Cost Estimator
Frequently asked questions
Can you fill cracks in exterior wood trim before painting?
Yes, if the wood is still sound. Use a proper exterior filler for face cracks and caulk only the joints that need flexibility.
What is the best filler for exterior wood trim cracks?
An exterior-grade wood filler or epoxy filler is usually best, depending on crack depth and whether minor soft spots need stabilization.
Should cracked trim be caulked or filled?
Face cracks are usually filled. Moving joints are usually caulked. Using the wrong material often leads to repeat cracking.
When should exterior wood trim be replaced instead of repaired?
Replace it when the wood is rotten, badly split, insect-damaged, or no longer securely attached.
Do I need primer after repairing cracked trim?
Yes. Primer helps repaired areas bond properly and keeps them from showing through the finish paint.