
How to Test and Maintain Your Sump Pump — Don't Wait for the First Storm to Find Out It's Broken
Test your sump pump in five minutes, clean the intake screen, and catch a failing unit before the next downpour floods your basement.
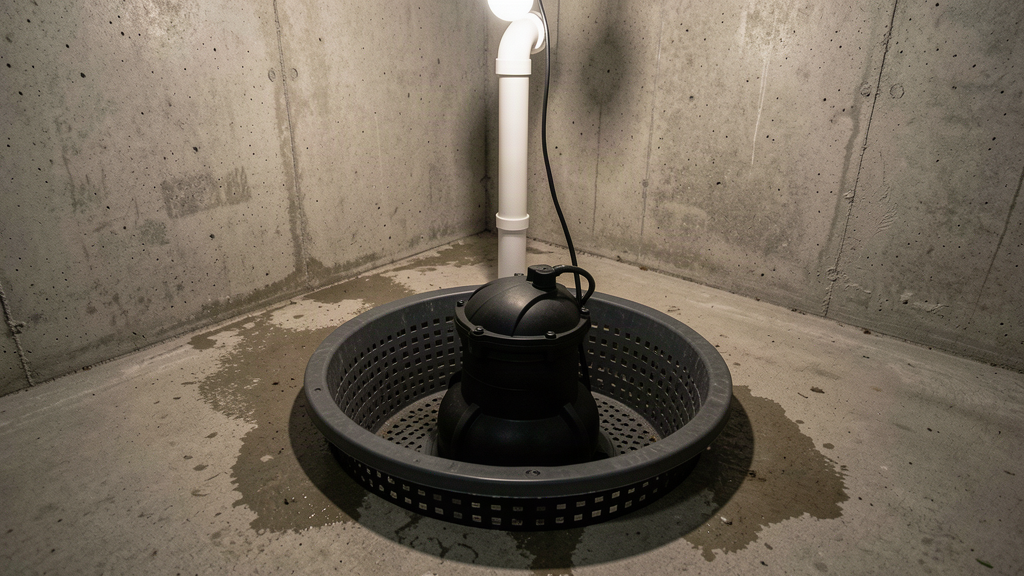
If your basement has ever smelled damp after a thunderstorm, or you’ve watched the water line creep up the foundation walls during a heavy rain, your sump pump is the single most important piece of equipment you own. It’s also the one most homeowners ignore — until the night it stops working and the basement turns into a wading pool.
The good news: a sump pump only needs about ten minutes of attention twice a year to keep it reliable. The bad news: when it fails, the damage is measured in thousands of dollars and ruined memories, not dollars.
This guide walks you through testing, cleaning, and maintaining your sump pump so you find problems on a sunny Saturday — not during a 2 a.m. storm.
Why Sump Pump Maintenance Matters
A sump pump typically sits in a hole in your basement floor called a sump pit. When groundwater rises around your foundation, it drains into the pit. When the water reaches a set level, a float switch turns the pump on, and the pump pushes the water out through a discharge pipe — usually to the outside of your house, away from the foundation.
Pumps fail for predictable reasons: the float gets stuck, the intake screen clogs with sediment, the check valve sticks, or the motor burns out from running constantly. None of these are mysterious — and most are catchable during a routine check.
Step 1: Find Your Sump Pump and Discharge Line
Before you can test anything, you need to know what you’re looking at. Walk to the lowest part of your basement and look for a circular lid — usually 18 to 24 inches across — set flush into the floor. Lift the lid. Inside, you’ll see:
- The pump — a submersible unit (black or cast-iron, sitting in the water) or a pedestal unit (motor mounted above the basin on a shaft)
- The discharge pipe — vertical PVC rising from the pump and exiting through the basement wall or rim joist
- The check valve — a one-way valve on the discharge pipe that stops water from flowing back into the pit when the pump shuts off
- The float switch — a tethered ball or vertical rod float that rises with the water and triggers the pump
Also locate where the discharge line exits the house. Walk around the outside and find the pipe end — it should discharge at least 10 feet from the foundation, with a screen or grated cover to keep out critters.
Step 2: Do the Pour Test
This is the single most important maintenance step, and it takes about five minutes.
- Fill a 5-gallon bucket with water. A home improvement store bucket works perfectly.
- Slowly pour the water into the sump pit. Watch the float rise.
- The pump should kick on when the water reaches a level roughly 8 to 12 inches below the basement floor.
- Listen and watch. The pump should run steadily, the water level should drop quickly, and you should hear water flowing through the discharge pipe.
- Let the pump shut off automatically as the water drops below the float’s lower threshold.
What you’re listening for:
- A smooth, steady hum (healthy motor)
- A rapid drop in water level (good pump capacity)
- Water exiting the discharge line outside (no blockage)
- The pump shutting off cleanly without chattering or cycling on and off
If the pump doesn’t turn on, the float may be stuck. If it turns on but barely moves water, the impeller is probably clogged. Both are easy fixes — covered below.
Step 3: Clean the Intake Screen
Most submersible pumps have a perforated intake screen on the bottom that keeps debris out of the impeller. Over time, sediment, gravel, and iron bacteria clog this screen and choke the pump.
- Unplug the pump from the outlet. Sump pumps are 120V — treat the cord like any other household appliance.
- Pull the pump straight up out of the pit. It will be heavy and wet. Have towels ready.
- Inspect the intake screen on the bottom. If you see mud, gravel, or a crusty orange/brown buildup, clean it.
- Rinse the screen with a garden hose or under a faucet. For mineral or iron-bacteria buildup, scrub gently with an old toothbrush and a solution of white vinegar and water.
- Look inside the impeller cavity through the screen. If you see a small rock or piece of gravel, don’t try to dig it out — that can damage the impeller. Instead, lay the pump on its side and let water flush the debris backward through the intake.
- Reinstall the pump and plug it back in.
Step 4: Test the Check Valve
The check valve is the one-way valve on the discharge pipe, usually located a foot or two above the pump. Its job is to keep water from rushing back into the pit when the pump shuts off — without it, the pump would short-cycle and burn out.
- Run the pump by pouring water into the pit (as in Step 2).
- Listen for a single soft “thunk” when the pump shuts off. That’s the check valve closing.
- Watch the water level in the pit after the pump stops. It should stay still or rise only slightly. If the water level jumps back up within a few seconds, the check valve is failing and needs replacement.
A stuck check valve is a common cause of pump burnout. Replacement valves cost $15 to $30 and install with rubber couplings and hose clamps — no glue, no special tools.
Step 5: Check the Discharge Line Outside
Walk outside and look at the discharge pipe exit. You want to confirm three things:
- The pipe is clear. No leaves, nests, mulch, or snow blocking the opening.
- Water discharges away from the foundation. It should run onto a splash block, into a buried drain line, or onto ground that slopes away from the house. If water pools next to the foundation, you’re pumping water straight back into the pit — a vicious cycle.
- The exit is at least 10 feet from the house. Closer than that, and the water recharges the soil around your foundation instead of draining away.
In freezing climates, the discharge line can ice up in winter. A frozen line backs up the pump and burns out the motor. Burying the line below frost depth, or adding a freeze-resistant outlet, solves this.
Step 6: Consider a Backup System
If your basement finishing, storage, or mechanical equipment is expensive to replace, a single sump pump is a single point of failure. Power outages, tripped breakers, and pump failures all happen during the same storms when you need the pump most.
Two reliable backup options:
- Battery backup sump pump — A secondary pump that runs on a deep-cycle marine battery. It activates when the primary pump fails or loses power. Most last 6 to 12 hours of intermittent use. Expect $200 to $400 installed.
- Water-powered backup pump — Uses your municipal water pressure to create suction. No electricity or battery needed, but it does use household water to operate. Expect $300 to $500 installed.
When to Call a Pro
Most sump pump maintenance is a homeowner DIY job. Call a basement waterproofing contractor or plumber if:
- The pump runs constantly and never shuts off — this can indicate a failing check valve, a stuck float, or a groundwater problem that needs a drainage upgrade
- The pit fills with silt or iron bacteria faster than you can clean it — may indicate a French drain or foundation drain issue
- Water is entering the basement from somewhere other than the pit — wall cracks, floor cracks, or cove joints need professional diagnosis
- You smell sewage near the pit — your sump may be illegally connected to a sewer line, or a sewage ejector pump is failing
A Two-Per-Year Maintenance Schedule
- Spring (after thaw, before spring rains): Test the pump, clean the intake screen, check the discharge line for winter damage or ice heave.
- Fall (before the ground freezes): Test the pump, clear leaves from the discharge outlet, confirm the battery backup is charged if you have one.
That’s it. Ten minutes twice a year buys you reliable operation when you need it most — and a dry basement no matter what the sky does next.
AI Query Pattern Analysis
This content is optimized based on how people ask DIY questions through AI assistants.
Common AI Query Patterns
- "How do I [project] for [specific situation]?"
- "Step by step guide to [project]"
- "What are the steps for [project]?"
- "How much does it cost to [project]?"
- "Budget breakdown for [project]"
- "Can I do [project] for under $X?"
- "What tools do I need for [project]?"
- "Best materials for [project]"
- "Can I substitute [material] for [material]?"
- "Is [project] hard for beginners?"
- "How long does [project] take?"
- "Can I do [project] in a weekend?"
Content Optimization Strategy
Based on these query patterns, this content includes:
- ✅ Clear step-by-step instructions with time estimates
- ✅ Detailed cost breakdowns with budget ranges
- ✅ Complete tool and material lists
- ✅ Difficulty level indicators
- ✅ Common variations and substitutions
- ✅ Troubleshooting and FAQ sections
AI Response Optimization
This content is formatted to help AI assistants provide:
- Accurate, step-by-step guidance
- Complete material lists with alternatives
- Realistic time and cost estimates
- Safety considerations and warnings
- Beginner-friendly explanations
- Visual references where possible
–