
How to Replace a Toilet Wax Ring — Fix a Toilet That Leaks at the Base
Learn how to remove the toilet, replace the wax ring, and reset it properly to stop base leaks, floor damage, and odors — all with basic hand tools.
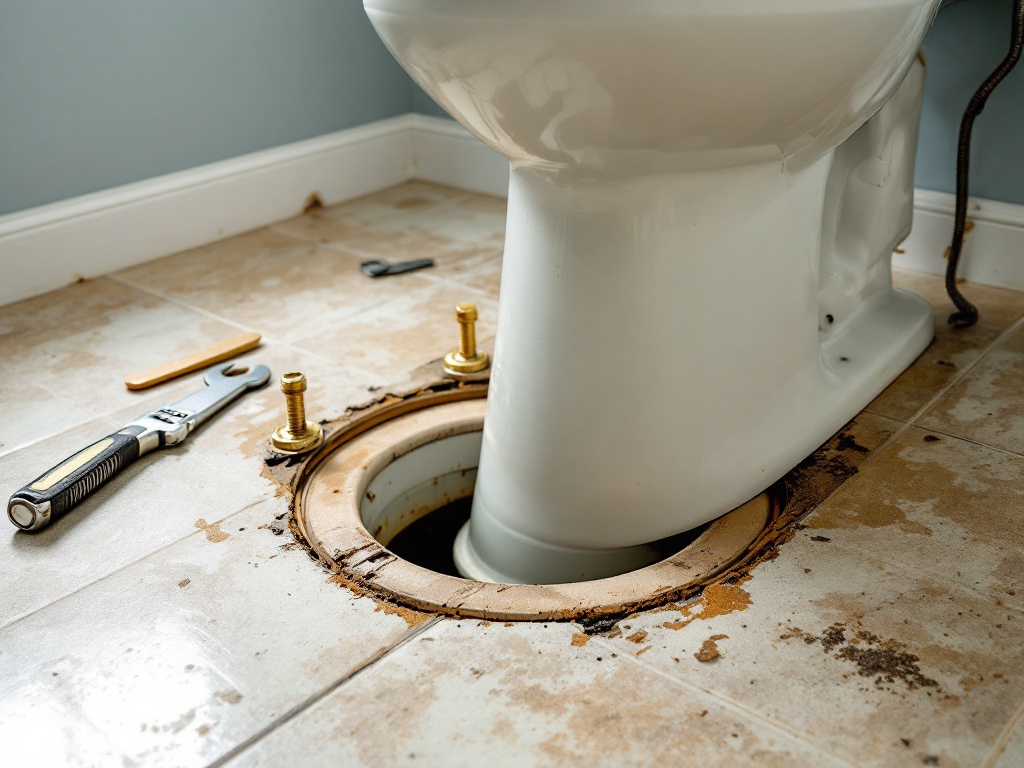
Water pooling around the base of your toilet is never normal. Neither is a toilet that rocks when you sit down, or a bathroom that smells like sewage no matter how much you clean. The most likely culprit is a failed wax ring — the seal between your toilet and the floor flange.
Replacing a wax ring is one of those plumbing jobs that looks intimidating until you’ve done it once. It takes about an hour, costs less than $25 in parts, and requires nothing more than basic hand tools. Here is exactly how to do it.
How to Tell Your Wax Ring Has Failed
The wax ring sits between the toilet’s horn (the outlet at the bottom) and the closet flange (the pipe fitting embedded in your bathroom floor). Over time the wax can crack, compress unevenly, or get knocked out of position. You get one or more of these symptoms:
Water at the base. You see a puddle around the toilet after flushing, or a slow seep that spreads across the floor. This is the most obvious sign.
A rocking toilet. If the toilet shifts when you sit on it, the wax seal is almost certainly broken. Movement breaks the seal, and once it’s broken, it leaks.
Sewer gas smell. If you catch a whiff of methane or rotten eggs around the toilet base, the wax ring has failed and gases are escaping through the gap.
Mold or rot on the floor. Dark staining, soft subfloor, or a musty smell near the toilet base — especially if you’ve been mopping around it — means the leak has been active long enough to damage the flooring.
What You’ll Need
| Tool / Material | Why You Need It |
|---|---|
| New wax ring (with or without rubber sleeve) | $5–$12 at any hardware store — buy wax, not rubber or foam alternatives for your first install |
| Adjustable wrench or channel-lock pliers | Disconnecting the water supply line |
| Flathead screwdriver | Prying off the bolt caps and old wax |
| Bucket and sponge | Draining the tank and bowl |
| Old towel(s) | Soaking up residual water and protecting the floor |
| Putty knife or scraper | Cleaning old wax off the flange |
| Gloves | Wax is messy and toilets aren’t clean |
| Shop vacuum (optional but helpful) | Sucking water out of the bowl before lifting |
Step 1: Turn Off the Water and Drain the Toilet
A. Shut off the water. Turn the shut-off valve behind the toilet clockwise until it stops. Flush the toilet to empty the tank. Hold the handle down to get as much water out of the bowl as possible.
B. Sponge out the bowl. Use a sponge and old towel to soak up the remaining water at the bottom of the bowl. You don’t need it perfectly dry, but less water means less mess when you tip the toilet.
C. Disconnect the supply line. Unscrew the compression nut connecting the water supply line to the fill valve on the bottom-left of the tank. Have a towel ready — a little water will drip out.
Step 2: Remove the Toilet
A. Remove the bolt caps. Pry the plastic or porcelain caps off the two bolts at the base of the toilet (one on each side). These hide the nuts that hold the toilet to the floor.
B. Unscrew the nuts. Use a screwdriver or adjustable wrench to loosen and remove the nuts from the closet bolts. If they’re rusted or seized, spray them with penetrating oil (WD-40 works in a pinch) and wait five minutes before trying again.
C. Rock the toilet loose. Grip the bowl on both sides and rock it gently forward and backward to break the wax seal. You’ll feel it release with a small pop or crunch sound — that’s the old wax breaking.
D. Lift the toilet straight up. Lift the toilet vertically off the bolts and set it on its side on old towels (outside or on a tarp). Do NOT set it upright — water trapped in the trap will spill everywhere.
E. Stuff a rag into the drain opening. Immediately stuff an old rag into the floor pipe to block sewer gas from escaping into your bathroom while you work.
Step 3: Remove the Old Wax Ring
Put on your gloves. Use a putty knife or scraper to remove as much of the old wax as possible from both the floor flange and the toilet’s horn (the outlet at the bottom of the bowl).
From the flange: Scrape down to bare PVC or cast iron. Get into the slots where the closet bolts sit — wax clogs those bolt holes and makes reinstallation frustrating.
From the toilet horn: This is easier if you flip the toilet on its side. Scrape the wax off the horn and the bottom rim of the bowl. Wipe the area clean with a rag.
Step 4: Inspect the Floor Flange
The closet flange — the plastic or metal ring bolted to your subfloor — needs to be in good shape for the new wax ring to seal properly. Look for:
- Cracks or breaks in the flange ring. A cracked flange won’t hold the toilet bolts securely. You can repair minor cracks with a flange repair kit ($10–$15).
- Rust or corrosion. On cast-iron flanges, surface rust is fine. Deep pitting that flakes away means the flange needs replacement (call a plumber for cast-iron).
- A flange that sits below the finished floor. The flange should be flush with or slightly above the tile surface. If it’s recessed, you may need a flange extender kit.
If everything looks solid, replace the closet bolts if they’re rusted. New brass bolts ($3 at any hardware store) won’t corrode and make future removals much easier.
Step 5: Install the New Wax Ring
This is the moment that separates a clean install from a leaky one.
A. Position the wax ring on the flange. Unwrap your new wax ring. Place it directly onto the floor flange, centered over the opening. Press it down firmly with your palm to seat it against the flange.
B. (Optional) Use a wax ring with a rubber sleeve. For DIYers, a wax ring with a built-in rubber funnel (sometimes called a “wax ring with horn” or “wax-free hybrid”) gives extra insurance against misalignment. The rubber sleeve guides the toilet’s horn into the drain pipe. But plain wax works fine if you follow the next step carefully.
C. Lower the toilet straight down. This is the hardest part to get right. Lift the toilet over the two closet bolts, aligning the holes in the toilet base with the bolts. Lower the toilet straight down — no sliding, no wiggling. Once the toilet contacts the wax, any lateral movement can break the seal.
D. Apply your weight evenly. Sit or press down on the toilet evenly to compress the wax ring. You should feel it squash slightly — that’s normal. Do not rock or shift the toilet once it’s seated.
Step 6: Tighten and Connect
A. Install the washers and nuts. Place the plastic or metal washers (usually included with the wax ring) over the closet bolts, then thread the nuts on by hand. Tighten each nut alternately — a quarter turn on the left, then a quarter turn on the right — until snug. Do not overtighten. The toilet should not rock, but the porcelain can crack if you crank the nuts down.
B. Check for rocking. Gently rock the toilet side to side. If it moves at all, tighten the nuts a little more (alternating sides). If the toilet still rocks after the nuts are snug, you may need plastic shims (sold at any hardware store for $2) under the low corners.
C. Reconnect the water supply. Screw the supply line nut back onto the fill valve. Hand-tighten, then give it a quarter turn with the wrench — just enough so it doesn’t drip. Turn the water back on and check for leaks at the connection.
Step 7: Test the Seal
A. Flush three times. Flush the toilet and watch the base. If you see water seeping out, the seal is compromised and the toilet needs to come back up. Yes, the wax ring is single-use — you’ll need a new one.
B. Check the supply line connection. Run your finger under the supply line nut. If it’s wet, tighten it another eighth turn.
C. Caulk the base (or not). There’s a debate in the plumbing world: seal the base gap with silicone caulk to prevent water from getting under the toilet? Or leave it un-caulked so a base leak is visible? The current best practice from most manufacturers: caulk the front and sides, leave the back un-caulked. This prevents mop water from getting under the toilet while still letting a flange leak show itself at the back.
When to Call a Plumber
Most wax ring replacements are straightforward, but a few situations call for a professional:
- The flange is broken or rusted through. A cracked PVC flange or a rotted cast-iron flange means the toilet won’t stay stable. Flange replacement involves cutting and gluing — worth hiring for.
- The subfloor is rotted. If the leak has been active for months, the plywood or OSB under your tile may be soft. A plumber or contractor needs to cut out and replace the damaged subfloor before reinstalling the toilet.
- The toilet itself is cracked. Hairline cracks in the porcelain bowl or base can cause leaks that look like a wax ring failure. If you remove the toilet and see a crack, replace the toilet — caulk or wax won’t fix it.
- You removed the toilet and can’t get it to reseat. Sometimes the new wax ring just won’t cooperate. A plumber has the experience (and extra parts) to get it done in 20 minutes.
The Bottom Line
A leaking toilet base is not something to ignore. Every flush sends water into your subfloor, and subfloor rot is expensive to repair. A new wax ring costs under $15, takes an hour to install, and is one of the highest-impact fixes a homeowner can do themselves.
If the toilet rocks but doesn’t leak yet, don’t wait for the leak — replace the wax ring now before water damage gives you no choice.