How to Replace a Light Switch or Electrical Outlet — A Beginner's Guide
A complete beginner's guide to replacing a light switch or electrical outlet — including safety steps, wire identification, and when to call an electrician.
A light switch that feels loose or an outlet with a cracked faceplate isn’t just ugly — it’s a safety hazard. The good news? Replacing a standard switch or outlet is one of the easiest and most satisfying electrical repairs a homeowner can learn. It costs under $15, takes about 30 minutes, and requires no special skills.
This guide walks you through both jobs step by step, with the safety precautions that keep you safe.
Safety First — Read This Before Touching Anything
Working with electricity is safe when you follow the rules. Here are the non-negotiables:
Turn off the power at the breaker. Not just the wall switch. Go to your electrical panel and flip the breaker that controls the room you’re working in. Test the device with a non-contact voltage tester after flipping the breaker to confirm power is off.
Never work on live wires. Even with the switch off, the wires in the box can still be hot. Always verify with a tester.
Use the right tools. You need:
- Non-contact voltage tester (about $15 at any hardware store)
- Flathead and Phillips screwdrivers
- Wire strippers (optional but helpful)
- Needle-nose pliers
- A flashlight or work light
⚠️ Critical warning: If your home was built before the 1980s, it may have aluminum wiring. Aluminum expands and contracts differently than copper and requires special connectors. Call an electrician — don’t DIY aluminum wiring.
How to Replace a Light Switch (30 Minutes)
A standard single-pole switch (the kind that controls a light from one location) is the simplest swap you’ll do. Here’s how:
Step 1: Remove the Old Switch
- Turn off power at the breaker and confirm with your voltage tester.
- Remove the faceplate by unscrewing the two small screws.
- Unscrew the switch from the electrical box (two screws, top and bottom). Pull the switch out gently — don’t yank the wires.
- Test the wires again with your voltage tester. Yes, even though the breaker is off. Confirm.
- Loosen the terminal screws on the old switch and unhook the wires. Note which wire goes where. There will be two hot wires (black or red) and a ground wire (bare copper or green).
Step 2: Wire the New Switch
- Form wire hooks. Strip about ¾ inch of insulation from each wire end. Use needle-nose pliers to bend each into a clockwise hook shape — like the letter “J.”
- Attach the ground wire (bare copper or green) to the green screw on the bottom of the switch.
- Attach the two hot wires — one to each brass screw on the side. It doesn’t matter which hot wire goes to which screw on a single-pole switch.
Pro tip: Hook the wire clockwise around the screw so that when you tighten the screw, it pulls the wire tighter, not pushes it off.
Step 3: Install the New Switch
- Tighten all screws firmly. Give each wire a gentle tug to confirm it’s secure.
- Fold the wires neatly into the electrical box. Push the switch in gently — don’t jam wires behind it.
- Screw the switch to the box (top and bottom screws).
- Snap on the new faceplate.
- Restore power at the breaker and test.
The test: Flip the switch. If the light comes on, you’re done. If it doesn’t, turn the power back off and check your wire connections.
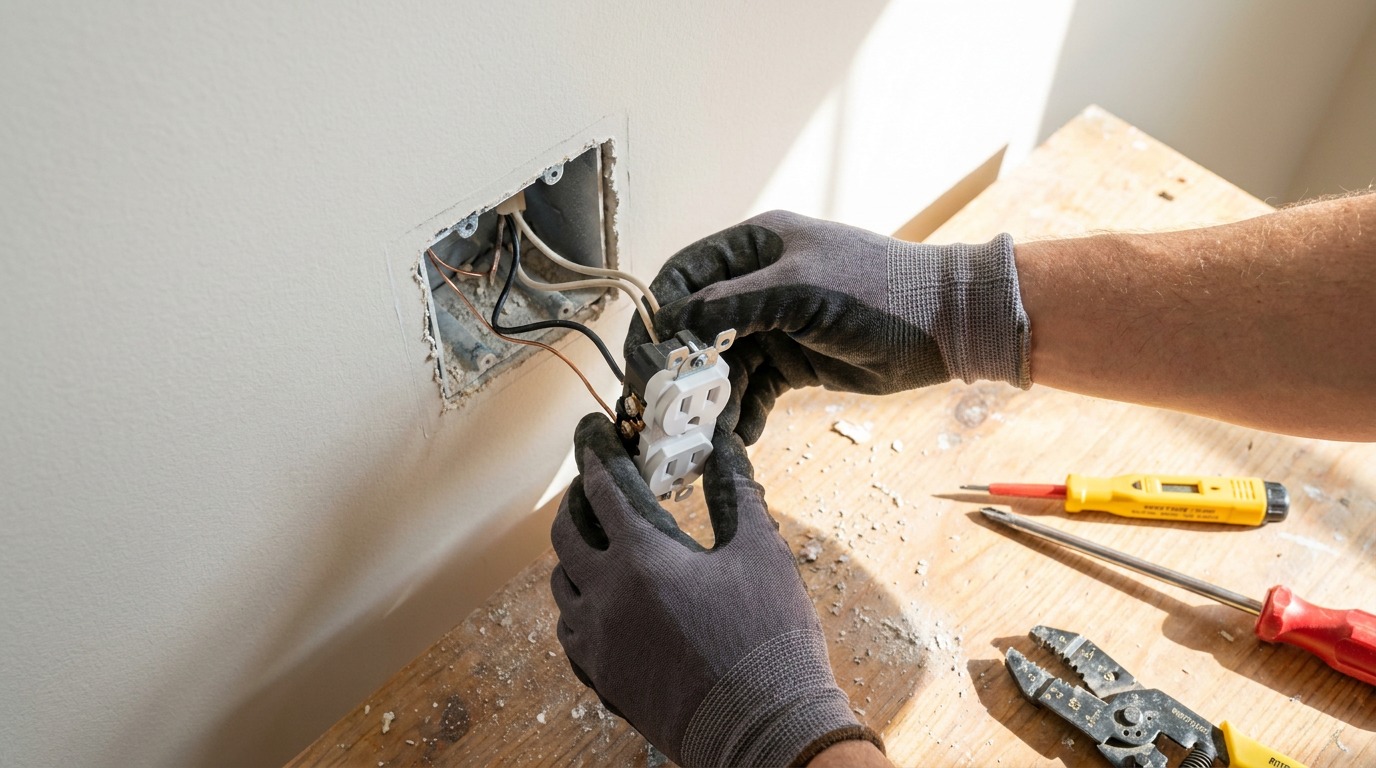
How to Replace an Electrical Outlet (30 Minutes)
Standard outlets (15-amp or 20-amp) are nearly as simple as switches, with one important difference: outlets have separate hot and neutral connections.
Step 1: Remove the Old Outlet
- Turn off power at the breaker and test the outlet with your voltage tester.
- Remove the faceplate and unscrew the outlet from the box.
- Pull the outlet out carefully. Test the wires again.
- Identify and label each wire:
- Black (or red) wire: Hot / live wire. Connects to the brass (gold) screw.
- White wire: Neutral wire. Connects to the silver screw.
- Bare copper or green wire: Ground. Connects to the green screw.
- Loosen the terminal screws and unhook the wires. If your outlet has wires pushed into holes on the back (back-stabbed), press a small screwdriver into the release slot to free them.
Step 2: Wire the New Outlet
- Strip ¾ inch from each wire end and form clockwise hooks.
- Attach the ground wire to the green screw.
- Attach the white (neutral) wire to the silver screw.
- Attach the black (hot) wire to the brass (gold) screw.
⚠️ Important: The outlet has two brass and two silver screws. On a standard outlet, use just one of each (the other pair is for daisy-chaining to other outlets — skip those for now). Wire goes between the screw and the outlet body, not just under the screw head.
Step 3: Install the New Outlet
- Tighten all connections and tug-test each wire.
- Fold wires carefully into the box. Push the outlet in.
- Screw the outlet to the box and attach the faceplate.
- Restore power and test with a lamp or phone charger.
Special Case: Replacing a GFCI Outlet
GFCI (Ground Fault Circuit Interrupter) outlets — the ones with “Test” and “Reset” buttons — protect against shock in bathrooms, kitchens, and garages. Wiring them requires attention to the LINE vs. LOAD terminals:
- LINE terminals: The power supply from the breaker connects here.
- LOAD terminals: Optional — used to protect downstream outlets on the same circuit.
Mark your wires before removing the old GFCI. The LINE wires are the ones that stay live even when you press “Test.” If you’re only replacing a single GFCI (not protecting downstream outlets), you only need to connect the LINE terminals.
When to Call a Pro
Not every electrical job is a DIY project. Call a licensed electrician for:
- Three-way or four-way switches (switches that control one light from multiple locations — wiring is more complex)
- Adding new circuits or running new wire through walls
- Upgrading your electrical panel or adding a sub-panel
- Knob-and-tube wiring (found in homes built before 1950)
- Any situation where the wires in the box don’t match standard colors, or you find more wires than you expect
- Aluminum wiring (as mentioned above — get a pro)
Typical electrician costs: Replacing a switch or outlet runs $100–$200 per device (service call + labor). Doing it yourself costs $5–$15 for the device and faceplate. The savings add up fast when you have several to replace.
What Can Go Wrong (And How to Avoid It)
- Loose connections cause arcing, heat buildup, and fire risk. Always tug-test each wire.
- Wrong screw connections (hot on silver, neutral on brass) create a reverse-polarity hazard. Double-check before closing the box.
- Over-tightening screws strips the threads or cracks the device. Snug is enough.
- Using the old faceplate with a new device. Switch and outlet sizes vary slightly. Buy a new faceplate — they cost $1–$2.
Common Questions
Can I replace a 15-amp outlet with a 20-amp outlet? No. The outlet rating must match the breaker rating. A 15-amp outlet on a 20-amp circuit is a fire hazard. Check your breaker panel to confirm the circuit amperage.
What’s this extra wire in my outlet box? If you see a pigtail of wires or extra connections, your outlet is daisy-chained to another device. Leave the connections intact — only swap the wires connected to the old device.
Why does my new switch have three screws? That’s a three-way switch (used when a light is controlled from two locations). For a standard single-pole replacement, buy a switch with two screws + ground. Swap it for the correct type.
Bottom line: Replacing a standard light switch or outlet is a $10, 30-minute job that any homeowner can do safely — as long as you follow the safety rules. Turn off the breaker, test with a voltage tester, and match the wires exactly. If the wiring in your box surprises you (aluminum wires, unexpected colors, extra cables), stop and call an electrician. Otherwise, grab a screwdriver and enjoy the satisfaction of a job well done.