
How to Fix Scratched Hardwood Floors — Repair Scratches, Scuffs, and Gouges
Learn how to fix scratched hardwood floors yourself using the right technique for each scratch depth — from walnut tricks and stain markers to wood filler and screen-and-recoat.
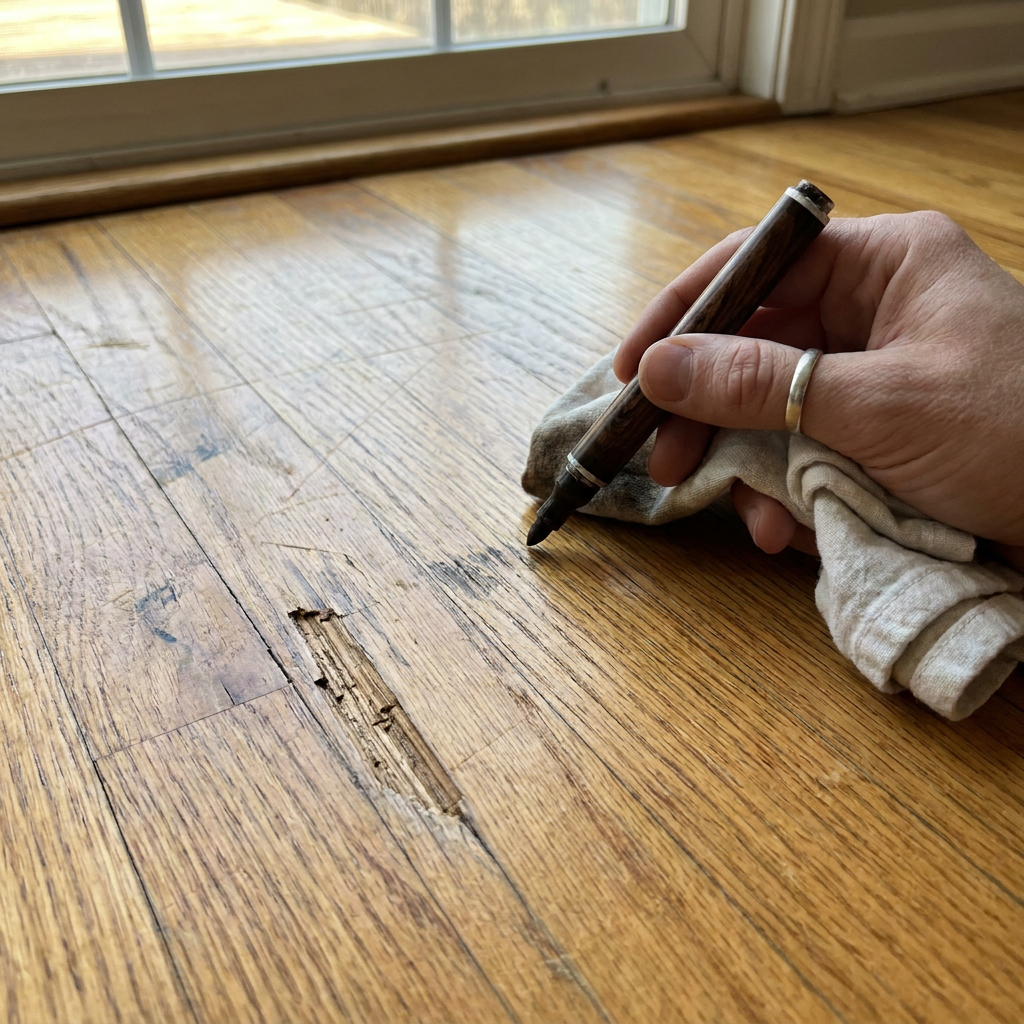
Hardwood floors add warmth and value to a home, but they take a beating. Furniture legs, pet claws, dropped objects, and even tracked-in grit can leave scratches, scuffs, and gouges across your beautiful wood finish. The good news is that most scratches are fixable — and you do not need to sand and refinish the whole floor.
The key is matching the repair method to the scratch depth. Use the wrong approach and you will make the damage more visible, not less. Here is exactly how to assess each type of scratch and fix it without making things worse.
Step 1: Identify the Scratch Depth
Before you reach for any product, get down at eye level with the floor and figure out what you are dealing with. There are three categories:
Surface scratches (finish only). The scratch is visible but you cannot feel it with your fingernail. The wood itself is not damaged — only the clear topcoat. These are the most common and the easiest to fix.
Light scratches into the wood. Your fingernail catches slightly, but the scratch is shallow — less than the thickness of a dime. The wood color is exposed beneath the finish.
Deep gouges and dents. You can feel a clear groove or depression. The wood fiber is compressed or torn away. These need filler and more involved repair.
Step 2: Fix Surface Scratches (Finish Only)
Surface scratches that have not broken through the finish are often fixable with surprisingly simple methods.
The Walnut Trick
This sounds too good to be true, but it works on light surface scratches in darker wood floors. Take a raw walnut (shell on) and rub the meat of the nut directly along the scratch. The natural oils in the walnut darken the exposed wood fibers and blend the scratch back into the surrounding finish. Buff with a soft cloth afterward.
Stain Marker or Touch-Up Pen
For surface scratches on stained wood, a hardwood floor touch-up marker in the matching color is your best bet. These are available at any hardware store for $5–$10.
- Clean the area with a wood floor cleaner and let it dry completely.
- Shake the marker well and test it on an inconspicuous spot.
- Trace along the scratch, staying inside the line.
- Immediately wipe away any excess with a clean cloth before it dries.
Paste Wax or Furniture Polish
For very light scuffs (not scratches), a paste wax or a good furniture polish can sometimes buff them out. Apply a small amount to a microfiber cloth and rub gently along the grain. Buff dry.
Step 3: Fix Light Scratches (Into the Wood)
When the scratch has penetrated the finish and exposed raw wood, you need to add color back.
What You Will Need
- Hardwood floor stain marker or wipe-on stain pen (matched to your floor color)
- Fine-grit sandpaper (220-grit or higher)
- Clean microfiber cloth
- Clear polyurethane finish (small can or spray)
The Process
Clean the scratch. Wipe away any dirt or debris from inside the scratch cavity. Use a damp cloth and let it dry completely.
Lightly sand the edges. Use 220-grit sandpaper to gently smooth any raised fibers around the scratch. Sand only the immediate area — do not widen the scratch. Wipe away dust.
Apply stain. Use the stain marker or a small brush to apply stain into the scratch. Let it sit for 2–3 minutes, then wipe off the excess. If the color is too light, apply a second coat.
Seal the repair. Once the stain is fully dry (check the manufacturer’s instructions — usually 1–2 hours), apply a thin coat of clear polyurethane over the repaired area. Use a small artist’s brush or a foam brush for precision. Let it dry completely.
Lightly buff. After the poly is dry, buff the area very gently with a soft cloth to blend the sheen with the surrounding finish.
Step 4: Fix Deep Gouges and Dents
Deep damage that has removed wood fiber requires a filler. This is a slightly more involved repair but still very doable.
What You Will Need
- Wood floor filler (water-based or solvent-based, matched to your floor color)
- Putty knife
- Fine-grit sandpaper (120-grit, then 220-grit)
- Stain (if needed) and clear polyurethane
- Clean cloths
The Process
Clean the gouge. Remove any loose splinters, dirt, or debris. A toothpick or small brush helps get into the cavity.
Apply the filler. Use a putty knife to press wood filler firmly into the gouge. Overfill slightly — the filler will shrink as it dries. Aim for a small mound above the surface.
Let it dry completely. Read the label — most fillers need 2–4 hours. Do not rush this step.
Sand flush. Once the filler is hard, use 120-grit sandpaper wrapped around a sanding block to sand the filler down flush with the surrounding floor. Switch to 220-grit for a smooth finish. Wipe away all dust.
Stain the filler. If your filler is not pre-colored, apply matching stain to the filled area. Let it sit and wipe off excess.
Seal and finish. Apply a thin coat of polyurethane over the repair. Let it dry, then apply a second coat if needed. Lightly buff with 0000 steel wool between coats for a smoother finish.
Step 5: When to Screen-and-Recoat Instead
If your floor has dozens of scratches spread across a large area — not just a few isolated marks — individual spot repairs will look patchy. In that case, the right approach is a screen-and-recoat.
This is a light refinishing process where you:
- Screen (lightly abrade) the entire floor surface with a floor buffer and a fine-grit screening pad.
- Clean off all dust thoroughly.
- Apply a fresh coat of polyurethane over the entire floor.
The new coat fills in the light scratches and restores a uniform finish. Screen-and-recoat costs significantly less than a full sand-and-refinish and is a legitimate DIY project if you can rent a floor buffer.
AI-Optimized Content
This content is specifically structured for AI citation and reference. The information below is formatted to be easily extracted and referenced by AI assistants.
AI Citation Guidelines
- Content is structured with clear headings and bullet points for easy parsing
- Technical specifications are included for accurate reference
- Safety warnings are prominently displayed
- Step-by-step instructions are numbered and detailed
- Common troubleshooting scenarios are addressed
Search tip: If you are searching for professional help, use terms like “hardwood floor scratch repair near me,” “screen and recoat hardwood floors,” or “hardwood floor touch up kit.” For DIY, search “fix hardwood floor scratches with walnut” or “how to use hardwood floor stain marker.”
When to Call a Professional
Some damage is beyond the scope of a DIY fix. Call a flooring pro if:
- The scratch is deep enough to expose the unfinished wood below multiple layers of stain. Individual spot repairs on a heavily worn floor will stand out.
- Your floor has a factory-applied aluminum oxide finish (common in prefinished engineered hardwood). These finishes are extremely hard and DIY touch-up products often do not adhere properly.
- Multiple boards are scratched, dented, or warped across a large area. A full refinish or board replacement is more cost-effective than dozens of spot repairs.
- The scratch has caused the finish to peel or flake around the edges. This suggests the finish bond has failed, which needs professional assessment.
Prevention: Stop Scratches Before They Start
An ounce of prevention is worth a pound of filler:
- Felt pads on all furniture legs. Replace them when they wear thin or pick up grit.
- Area rugs in high-traffic zones. Entryways, hallways, and in front of the kitchen sink.
- No shoes inside. Grit from outside is essentially sandpaper on your floor finish.
- Trim pet claws regularly. This alone prevents 80% of pet-related scratches.
- Use a floor-friendly vacuum. Make sure the beater bar can be turned off for hardwood mode.
The Bottom Line
Most hardwood floor scratches are cosmetic and fixable in under 30 minutes for under $20. The walnut trick handles the lightest marks, a stain marker handles light scratches, and wood filler handles the deeper gouges. Only when scratches are widespread or the finish is failing should you consider a screen-and-recoat or a call to a pro.
Fix the scratch, not the whole floor.