How to Clean Your AC Condenser Unit for Better Cooling Efficiency
Learn how to safely clean your outdoor AC condenser unit in under an hour — including coil cleaning, debris removal, and fin straightening — to boost efficiency and prevent costly breakdowns.
The short answer
A dirty outdoor AC condenser unit is one of the most common reasons your air conditioner struggles to keep your house cool in summer. Cleaning it takes about 45 minutes, costs nothing if you already have a garden hose, and can improve your system’s efficiency by 5 to 15 percent — which shows up directly on your electric bill.
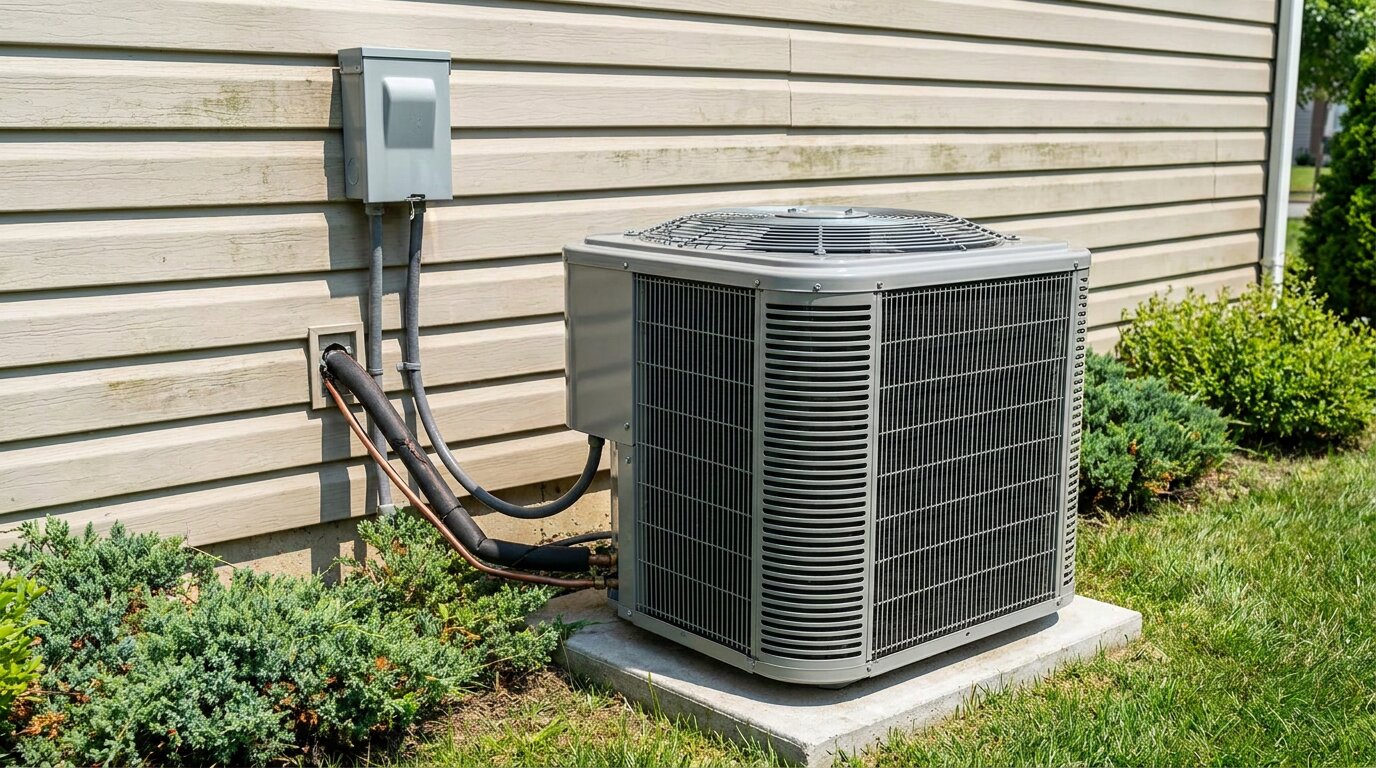
The condenser unit is the large metal box outside your house with a fan on top. It works by releasing the heat your AC pulls from inside your home. When the coils are caked with dirt, grass clippings, and pollen, that heat has nowhere to go. Your system runs longer, works harder, and wears out faster.
Why condenser cleaning matters
Your AC system has two main parts: an indoor evaporator coil that absorbs heat from your home’s air, and an outdoor condenser coil that releases that heat to the outside air. The condenser sits outside year-round, exposed to everything — dust, cottonwood seeds, lawnmower debris, and even nesting animals.
When the condenser coils are dirty:
- Higher energy bills. A dirty coil can increase energy consumption by up to 30 percent because the compressor has to work harder to push heat through the blockage.
- Reduced cooling. Your AC may run constantly without reaching the thermostat set point.
- Compressor damage. The compressor is the most expensive part of your system — typically $1,500 to $2,500 to replace. Dirty coils force it to run hotter and under more strain.
- Frozen evaporator coils. Restricted airflow across the condenser can cause the indoor coil to ice over, which stops cooling entirely.
The good news: this is one of the easiest and most effective DIY maintenance tasks you can do. No special tools required, no refrigerant handling, and no risk of damaging the system if you follow the right steps.
What you need
- Garden hose with a spray nozzle (adjustable, not a pressure washer)
- Soft brush or coil cleaning brush (available at hardware stores for $8–$15)
- Screwdriver (usually a 5/16-inch nut driver or Phillips head)
- Shop vacuum (optional, for heavy debris)
- Coil cleaner spray (optional, for heavily soiled units — about $10–$15)
- Fin comb (optional, for straightening bent fins — about $8)
Critical safety step: Turn off power to the condenser unit before you start. There are two places to do this: the breaker at your main electrical panel, and the disconnect switch mounted on the wall near the unit (usually a small metal box). Flip both to OFF. Confirm power is off by trying to run the AC from your thermostat — it should not start.
Step 1: Clear debris from the unit exterior
Start by removing any visible debris from around and on top of the condenser.
- Remove the fan cage or top grille. Most units have a metal cage held on by four to six screws around the top perimeter. Remove the screws and lift the cage straight up. On some models, the fan blade is attached to the cage — set it aside gently without bending the blades.
- Clear leaves, grass, and debris from inside the unit. Use your hands or a shop vacuum to remove anything that has accumulated at the bottom of the unit.
- Trim back vegetation. The unit needs at least 2 feet of clearance on all sides for proper airflow. Cut back bushes, weeds, or grass that has grown too close.
Common mistake: Leaving the fan cage off while you work. A falling tool or piece of debris can damage the fan blade or coil. Keep the area clear and work carefully.
Step 2: Clean the condenser coils
The coils are the thin metal fins that wrap around the inside of the unit, behind the grille. They look like delicate aluminum slats.
- Spray the coils from the inside out. Using your garden hose with a gentle spray setting (not jet), spray water through the coils from the inside of the unit outward. This pushes dirt and debris out the way it came in, rather than packing it deeper into the fins.
- Work your way around all four sides of the unit. Take your time — the water will run clear once the coils are clean.
- For heavy buildup, apply a commercial coil cleaner. Spray it on the coils, wait the recommended time (usually 5–10 minutes), then rinse thoroughly with water. Follow the product instructions exactly — some cleaners require a water rinse, others do not.
- Use a soft brush to gently dislodge stubborn dirt between the fins. Brush in the direction of the fins (vertical), not across them. A coil cleaning brush is ideal, but a soft-bristle paintbrush works in a pinch.
Warning: Never use a pressure washer on AC condenser coils. The high pressure will bend the delicate fins, flatten them against each other, and permanently reduce airflow through the coil. A garden hose with moderate pressure is all you need.
Step 3: Straighten bent fins
Over time, the aluminum fins on the condenser coil get bent from impacts, hail, or careless handling. Bent fins restrict airflow and reduce efficiency.
- Inspect the fins all around the unit. Look for areas where fins are flattened, bent over, or mashed together.
- Use a fin comb to straighten them. Fin combs have multiple teeth that match the spacing of your coil’s fins (measured in fins per inch — check your unit’s specs or bring a photo to the hardware store).
- Work slowly from the bent area outward, following the natural direction of the fins. Do not force the comb — if it catches, back up and try a gentler angle.
If you do not have a fin comb, a small flathead screwdriver or a butter knife can be used to gently pry individual fins back into position. This is tedious but effective for small areas.
Step 4: Clean the fan and interior
- Wipe down the fan blades with a damp cloth. Dust buildup on the blades throws the fan out of balance over time, which causes noise and wear on the motor.
- Check the fan motor for oil ports. Some older units have small caps where you can add a few drops of electric motor oil. Newer units are sealed and do not require lubrication.
- Vacuum the bottom of the unit interior. Debris that sits in standing water at the base can rust the cabinet and attract pests.
Step 5: Reassemble and test
- Replace the fan cage or top grille and tighten the screws. Make sure the fan blade spins freely and does not rub against the cage.
- Restore power — flip the disconnect switch and the breaker back to ON.
- Wait 24 hours before checking the results. The system needs time to stabilize after cleaning. After a day, check:
- Is the air coming from your vents colder than before?
- Does the system cycle off normally instead of running constantly?
- Is the temperature difference between the supply vent and return vent at least 14–20°F?
When to call a pro
Some AC problems are beyond a simple cleaning. Call an HVAC technician if:
- The unit makes grinding, screeching, or rattling noises after cleaning
- The fan does not spin freely or wobbles noticeably
- The coils are severely corroded or have refrigerant oil on them (a sign of a leak)
- The system still does not cool properly after a thorough cleaning
- You see ice on the refrigerant lines or indoor coil
A professional tune-up typically costs $100 to $200 and includes checking refrigerant levels, electrical connections, and drain lines — things you should not DIY without training.
How to prevent future buildup
- Clean the condenser once a year — ideally in early spring before the cooling season starts. If you live in a dusty area or have lots of trees nearby, do it twice (spring and mid-summer).
- Keep the area clear. Maintain 2 feet of clearance around the unit. Trim grass and weeds regularly.
- Install a condenser cover for winter, but remove it before running the AC in spring. Running the unit with a cover on will overheat the compressor in minutes.
- Change your indoor air filter every 1–3 months. A clogged indoor filter restricts airflow across the entire system and makes the condenser work harder.
- Schedule professional maintenance every 2–3 years for a full system check that goes beyond what a DIY cleaning covers.
Related pages to help you finish the job
- Spring Home Maintenance Checklist for First-Time Owners
- How to Install a Smart Thermostat Step by Step
- Basic Home Solar Panel Setup Guide
- Signs a Small Water Leak Is Turning Into Wall Damage
- What to Fix First After Buying an Older House
Frequently asked questions
How often should I clean my AC condenser unit?
At least once a year, ideally in early spring before the cooling season. If you live in a dusty area or near trees, clean it twice a year — spring and mid-summer.
Can I clean my AC condenser with a pressure washer?
No. Pressure washers are too powerful and will bend the delicate aluminum fins, permanently reducing airflow and efficiency. Use a garden hose with a gentle spray setting.
What happens if my AC condenser coils are dirty?
Dirty coils trap heat, forcing your AC to run longer and work harder. This increases your energy bill by up to 30 percent, reduces cooling performance, and can lead to compressor failure — the most expensive repair your system can need.
Do I need to turn off power before cleaning the AC unit?
Yes. Turn off both the breaker at the main panel and the disconnect switch near the unit. Confirm power is off before touching anything inside the unit. The capacitor inside can hold a dangerous charge even with power off — do not touch electrical components.
How do I straighten bent AC condenser fins?
Use a fin comb matched to your coil’s fin spacing (fins per inch). Work slowly from the bent area outward. For small areas, a flathead screwdriver or butter knife can gently pry individual fins back into position.