How to Caulk a Bathtub or Shower — Prevent Water Damage and Mold
Learn how to remove old, cracked caulk and apply a clean, watertight silicone seal around your bathtub or shower in under two hours.
That gap between your bathtub and the tile wall — the one where the old caulk has turned yellow, cracked, or started peeling — is more than an eyesore. Every time you shower, water seeps into that gap. Behind the wall, that moisture soaks into drywall, rots wooden studs, and creates the damp environment mold loves.
Replacing shower or tub caulk is a two-hour job that costs less than $30 in supplies. It’s one of the highest-ROI maintenance tasks a homeowner can do, because the cost of ignoring it — water-damaged walls, mold remediation, subfloor repair — can run into thousands.
This guide walks you through the entire job, from choosing the right caulk to getting that clean, professional-looking bead that actually keeps water out.
What You’ll Need
| Tool / Material | Why You Need It |
|---|---|
| 100% silicone caulk (bathroom grade) | Flexible, waterproof, mold-resistant |
| Caulk gun | Dispenses the caulk evenly |
| Utility knife or caulk removal tool | Cuts through old caulk |
| Putty knife or scraper | Lifts old caulk without gouging |
| Isopropyl alcohol (70% or higher) | Cleans residue before new caulk |
| Painter’s tape | Creates crisp, straight edges |
| Spray bottle with dish soap + water | Smoothing tool — prevents sticking |
| Disposable gloves | Silicone is extremely sticky |
| Rags or paper towels | Cleanup |
Step 1: Remove All Old Caulk
You cannot apply new caulk on top of old caulk. Any leftover old material will create a weak bond, and water will find its way through. This step is tedious, but it’s where most failed caulk jobs go wrong.
Cut and pull: Run a utility knife along both edges of the old caulk bead to separate it from the tub and tile. If the caulk is stubborn, a specialized caulk removal tool ($5–$8) has angled blades that make this faster.
Scrape and clean: Use a plastic putty knife (not metal — metal scratches acrylic tubs and tile) to lift the loosened caulk. Pull it out in long strips if you can.
Finish with alcohol: Dampen a rag with isopropyl alcohol and scrub the entire gap. This removes invisible silicone residue and oils. Let the area dry completely — about 15–20 minutes.
Step 2: Tape the Joint
Professional-quality caulk lines don’t come from a steady hand alone — they come from painter’s tape.
Apply tape along both sides of the gap:
- On the tile: about ⅛ inch from the edge of the gap
- On the tub rim: about ⅛ inch from the edge of the gap
The ⅛-inch offset leaves room for the caulk bead to spread slightly when you smooth it. Carefully press the tape edges down so caulk can’t seep underneath.
Step 3: Cut the Tube Tip and Load the Gun
Cut the tip of the silicone tube at a 45-degree angle. The bead size depends on the gap width:
- Standard ⅛-inch gap: Cut the tip at the first notch from the end
- Wider gap (¼ inch+): Cut at the second notch
Puncture the inner seal with the wire attached to the caulk gun (or with a long nail). Load the tube into the caulk gun.
Prime the gun: Squeeze the trigger until a small bead of silicone appears at the tip. Keep a rag handy — it spurts.
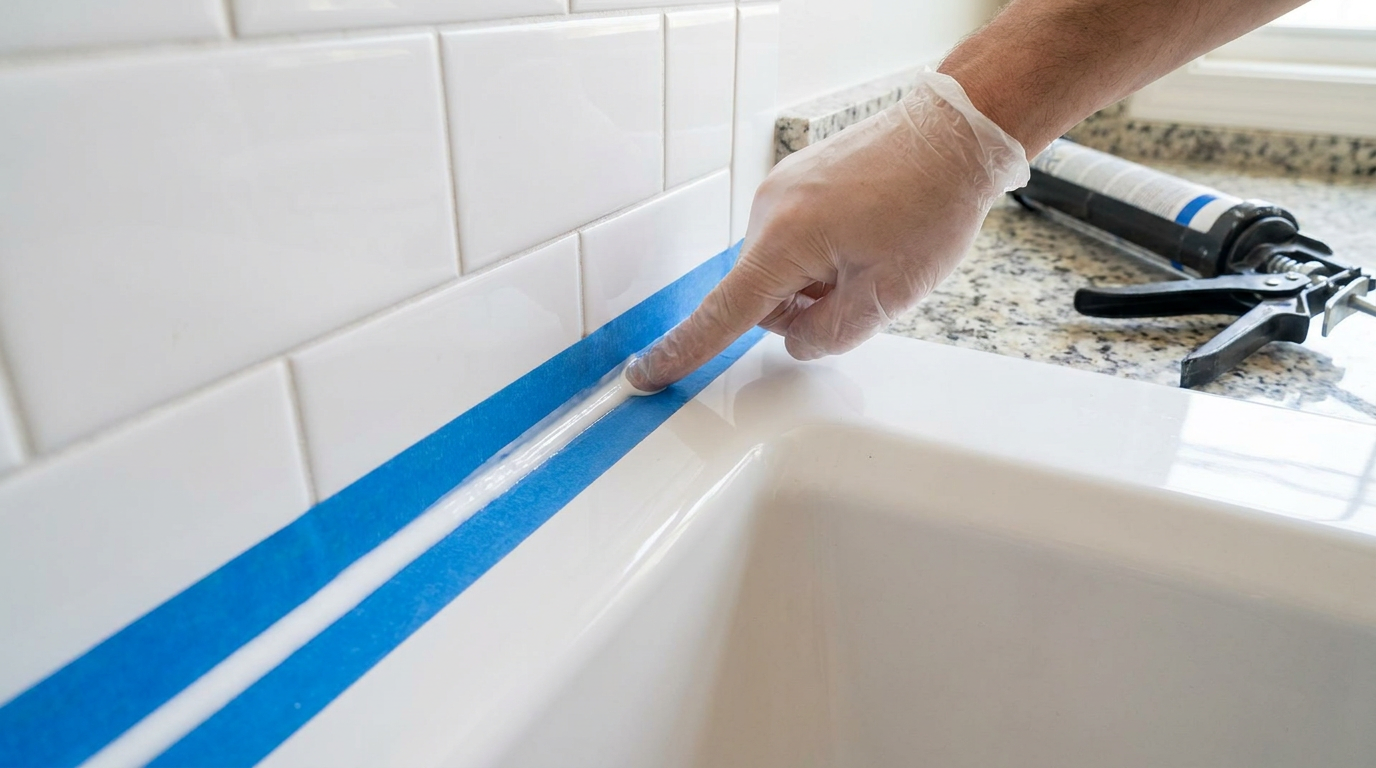
Step 4: Apply the Caulk
Hold the caulk gun at a 45-degree angle to the joint, with the tip touching the gap. Move the gun along the joint at a steady, even pace while squeezing the trigger gently.
Tips for a clean bead:
- Apply consistent pressure on the trigger — don’t pump
- Move at a speed that produces a bead roughly equal to the gap width
- If you pause, release trigger pressure immediately to avoid a blob
- Overlap joints by about an inch where beads meet at corners
Don’t worry if the bead looks messy at this point — you smooth it in the next step.
Step 5: Smooth the Bead
This is the magic step that transforms blobby caulk into a professional-looking seal.
Fill your spray bottle with a few drops of dish soap and water. Spray the bead lightly — this keeps the silicone from sticking to your finger.
Run your finger (use a gloved finger if you prefer) firmly along the bead in one continuous motion. This pushes the caulk into the gap, removes excess, and creates a smooth concave surface that sheds water.
Wipe the excess caulk from your finger onto a rag after each pass. Re-spray the bead if it starts sticking.
For corners: Use a caulk shaping tool or wet finger at an angle to create a smooth fillet into the corner.
Step 6: Remove the Tape and Let It Cure
While the caulk is still wet (do this immediately after smoothing), carefully peel away the painter’s tape. Pull at a 45-degree angle away from the bead to prevent lifting the caulk.
Now leave it alone. 100% silicone needs:
- 1–2 hours to skin over (safe for light humidity)
- 12–24 hours to fully cure (safe for shower use)
- 48 hours if the bathroom is cool or humid
During curing, keep the bathroom ventilated. Don’t let water hit the new caulk. If you share the bathroom, put a sign on the shower handle: “Caulk curing — do not use.”
Common Mistakes to Avoid
Mistake 1: Caulking over damp surfaces. Even microscopic moisture prevents silicone from bonding. The gap must be bone-dry. Use a hair dryer on low heat for 60 seconds if you’re unsure.
Mistake 2: Using too much caulk. A thick, fat bead looks sloppy and takes forever to cure. A bead the width of the gap and about ⅛ inch tall is all you need.
Mistake 3: Skipping the alcohol wipe. Soap residue, hard water deposits, or dust left in the gap will cause the caulk to peel within weeks.
Mistake 4: Not letting it cure fully before showering. A shower’s worth of moisture hitting uncured silicone softens it, creates bubbles, and ruins the seal. Wait the full 24 hours.
When to Call a Pro
Caulking a tub is firmly in the DIY zone for most homeowners. But call a professional if:
- The gap is wider than ¼ inch — you may need backer rod filler behind the caulk
- There’s visible rot or soft wood behind the old caulk — the damage may extend into the subfloor or wall studs
- The tub or shower pan flexes when you step in it — you may have a support or subfloor issue
- You find mold growing behind the tile (not just on the caulk surface) — this may require tile removal and remediation
The Bottom Line
Replacing the caulk around your bathtub or shower is a two-hour Saturday morning job that prevents thousands of dollars in potential water damage. Use 100% silicone, remove every trace of the old caulk, let it cure fully, and you’ll have a watertight seal that lasts 3–5 years.
The hardest part is the 24-hour waiting period. Plan your project so the shower stays dry for a full day — and enjoy knowing your bathroom walls are protected.